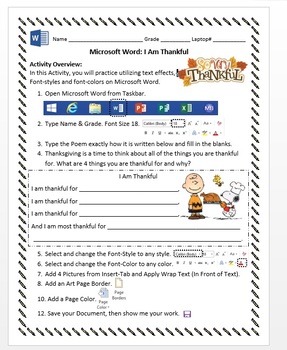
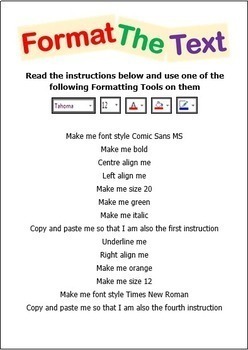
copy paste aqui----instrucciones
Mrs Maldonado Teacher Blog
This is a teaching module blog, with the purpose of making available most of the lessons for the English or Computer courses. Here you can find Literature content, Assessment or Evaluation material. Homework and/or other material. All content is available for downloading and referencing. Comments or critique are welcome. Here you will also find learning material, modules, videos, and any other resource related to Technology/ Computer Class from K-12.
Tuesday, May 21, 2019
Typing Practice_Word
If you are new to word processing, you will
probably benefit from some typing practice and need to do this entire task.
Otherwise you can move on to section 4 (Editing a document).
1.
Enter the following text in a
new document:
Jeremy Bentham
The
philosopher and jurist Jeremy Bentham (1748-1832) was born at Houndsditch, London 15th February 1748 . He
proved to be something of a child prodigy: while still a toddler he was
discovered sitting at his father’s desk reading a multi-volume history of England
Bentham,
however, soon became disillusioned with the law, especially after hearing the
lectures of the leading authority of the day, Sir William Blackstone (1723-80).
Instead of practising the law, he decided to write about it, and he spent his
life criticising the existing law and suggesting ways for its improvement. His
father’s death in 1792 left him financially independent, and for nearly forty
years he lived quietly in Westminster, producing between ten and twenty sheets
of manuscript a day, even when he was in his eighties.
2.
Save the file with the name jeremy.doc on the R: drive in the
training.dir\word\getting-started folder.
3.
Close the file.
using toolbars_ Word
Using Toolbars
1.
Right click anywhere on the
toolbar to display the toolbar options.
2.
Left click on Drawing to display the Drawing toolbar.
Note that it appears at the bottom of
your document screen.
3.
Right click on the Drawing
toolbar and Left click on Drawing to
remove it from your screen.
4.
Press Alt+V to display the View
menu. Click on Toolbars to display
the dialog box. Select Table and Borders.
5.
This toolbar will be displayed
as a floating toolbar. You can drag the title bar of the toolbar and place it
anywhere on your screen. Click on the Close
button on the toolbar title bar to close it.
6.
Click on the double arrow to
the right of the Standard toolbar to display more toolbar buttons.
7.
Click on Add or Remove Buttons to display a list of Standard toolbar
buttons. Select (or deselect) the buttons you want to appear on your toolbar.
8.
Click away from your toolbar to
deselect it.
Word 2013 Activity 2 May 22nd. 2019.
 WORD PROCESSING ACTIVITY 2
What you will learn:
- Changing font and size
- Changing alignment
- Using bold and underlining
- Typing using word wrap (soft return)
DIRECTIONS:
1.
Open a blank
Word document.
2. Change to Arial style font, size 14.
(Font style and size are located in the upper tool bar.)
3.
Type: your name (first and last). Hit ENTER once.
4.
Type: Word
Processing Activity 1. Press
ENTER key 2 times.
5.
Type: the name
of your school in a different font and use size 18 point. Press ENTER key 2 times.
6.
Type the
following paragraph. Do not indent. At the end of each paragraph, press the ENTER
key two times.
Master Yoda
says that fear is the path to the dark side. Fear leads to anger. Anger
leads to hate. Hate leads to suffering.
Master Yoda is very smart.
Emperor
Palpatine said that a Jedi gains power through understanding and a Sith gains
understanding through power.
7.
Type your
name once again. Underline
it. Italicize
it. Bold
it.
8.
Change the
first paragraph to right alignment.
(Alignment icons are to the right of B I U series.)
Hold your cursor on top of them to read which one is which.)
9.
Change the
second paragraph to justified alignment.
10.
Center your
name at the bottom using the centering alignment icon.
11.
Make the
school name Bold. (Use the B icon.).
12.
Proofread
your assignment with the sample on the back.
The margins may be different
so length of lines might vary.
13.
Save
as Activity 1. (FILE – SAVE AS. Click on the down arrow next to My
Documents. Click on your log in
name. Type Activity 1 under File
Name. Click on Save.)
14.
Open Edmodo.com
and log in to your account. Find Word
Activity One on the list of assignments.
Click “turn it in”. You will need
to browse in your network files and find Activity 1, click on it, and then
click TURN IN ASSIGNMENT. In a few days
you will find the grade posted. If you
click on the grade, the comments made by the teacher can also be read. Be
sure to read these comments as they will give you helpful information in
completing additional work.
15. You will NOT
print unless directed by your instructor. If asked to print, go to FILE – PRINT. Make sure one copy only is marked. To make sure you print ONLY the page you
currently typed, click CURRENT PAGE.
Then click OK.
Teacher
Sample
Activity
1
Master Yoda says that fear is the path to the dark
side. Fear leads to anger. Anger leads
to hate. Hate leads to suffering. Master
Yoda is very smart.
Emperor Palpatine said that a Jedi gains power through
understanding and a Sith gains understanding through power.
Tuesday, May 7, 2019
creating your own voki
https://www.google.com/search?q=creating+my+own+voki&rlz=1C1KYPA_enPR811PR811&oq=creating+my+own+voki&aqs=chrome..69i57.7239j0j8&sourceid=chrome&ie=UTF-8#kpvalbx=1
https://www.google.com/search?q=creating+my+own+voki&rlz=1C1KYPA_enPR811PR811&oq=creating+my+own+voki&aqs=chrome..69i57.7239j0j8&sourceid=chrome&ie=UTF-8#kpvalbx=1
Subscribe to:
Posts (Atom)

